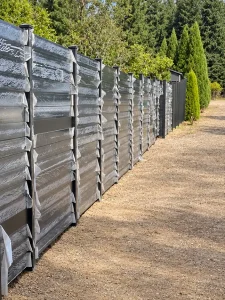
How to Anchor Aluminum Fence Posts in Dirt: Foundations, Supports & Site Planning
Plan a reliable support system for aluminum fencing on soil sites. Understand mounting options, buried protection, installation checks and the information needed for custom posts and gates.
Compare Anchoring MethodsComenta tu proyectoHow Should Aluminum Fence Posts Be Anchored in Dirt?
Use a support system designed for the selected fence and the actual ground conditions. For an embedded-post system, this commonly means a specified below-ground foundation supporting the post. A purpose-designed ground anchor is another possible system, but it must be verified for the project and compatible with the fence.
Installing on a soil site does not automatically mean placing a bare post in a hole and filling around it with loose earth. The foundation or anchor transfers loads from the post into the ground; the whole assembly needs to be considered.
This guide helps homeowners, contractors and project buyers prepare an installation plan and a clear component schedule for WONDERFUL METAL aluminum fencing. Final foundation dimensions and installation procedures follow the approved product and project details.
Understand the Load Path Before Choosing a Method
Think of the installation as a connected sequence: panel, bracket or rail connection, post, foundation or anchor, and supporting ground. Improving one item does not automatically correct a weakness elsewhere.
A large foundation cannot make an unsuitable panel connection adequate. Likewise, a stronger post does not make loose fill a reliable foundation. Ask the responsible designer or installer to coordinate the complete arrangement, including the way the aluminum post is protected at buried connections.
Start with the actual fence layout. Panel height, bay width, infill arrangement and gate locations are more useful than a generic description such as “standard backyard fence.”

Compare Ground Anchoring Approaches
| Approach | What Needs to Be Confirmed | Do Not Assume |
|---|---|---|
| Embedded post in a concrete foundation | Post compatibility, buried protection, embedment, footing geometry and ground design assumptions. | That any aluminum section may be embedded without the specified protection and detailing. |
| Post on a designed concrete pedestal | Foundation, base plate, weld, anchor and bearing details. | That the pedestal is adequate merely because it is concrete. |
| Purpose-designed ground anchor or driven support | Documented capacity for the site, compatible post connection and installation verification. | That an embedded post can be driven directly or paired with an arbitrary spike. |
| Aggregate or earth backfill | Express product approval and a design establishing the required capacity and installation controls. | That tamping material around a post is an equivalent substitute for the specified foundation. |
Choose the method before ordering the posts. Changing from embedded to base plate mounting can change lengths, connections and hardware. A contractor should not have to invent that conversion after the shipment arrives.
Collect Ground Information Before Excavation
| Condition to Identify | Why It Belongs in the Project Brief |
|---|---|
| Recently placed fill or disturbed ground | Support conditions may differ from the original natural ground. |
| Loose or variable strata | The proposed foundation may need review beyond a shallow surface inspection. |
| Expansive ground | Seasonal movement can affect supports and clearances. |
| Water or poor drainage | Construction and long-term support details may need adjustment. |
| Cold-climate exposure | Applicable frost-protection requirements must be addressed. |
| Slopes, retaining walls or edges | Foundation location and nearby structures can affect the support design. |
Use available site investigations and obtain further assessment where necessary. A handful of soil or a description from a neighboring property is not a substitute for the information needed to design the supports.
If actual excavation conditions differ from the assumptions, stop the affected work and resolve the detail before placing the foundation. Do not compensate for unexpected conditions with an unapproved extra bag of concrete.
Step 1: Confirm Layout, Services and Finished Levels
Establish the fence position from the agreed site plan and verify the boundary through the appropriate local process. Arrange utility locating before excavation, including checks for private irrigation, drainage and other services.
Mark gate openings, corners, wall connections and changes in elevation. Record the final paving or landscaping levels so visible post heights and panel clearances are measured from the correct reference.
Use the approved installation module for spacing. A panel's manufactured width is not automatically the clear opening or the post-center distance. Resolve short end bays and special angles before fixing post positions.
Step 2: Specify Post Length and Foundation Geometry
Keep total post length, visible height, embedment and excavation depth separate on the drawing. A footing can extend below the post, and the excavation may include preparation layers that are not part of the embedment.
Do not select foundation dimensions from fence height alone. Ground conditions, exposure, panel configuration, connection details and gate loads all belong in the design review. A nominal product diagram is a reference configuration rather than approval for every site.
Before production, reconcile the post schedule with the mounting detail. Confirm the section, material, finish, buried protection, cap and any prepared connection points. See our aluminum fence post range y embedded aluminum square posts when discussing supply.
Step 3: Prepare and Check the Excavation
Use suitable equipment and a safe excavation method for the site. Verify the hole position and geometry against the drawing, and check the base and sides for unsuitable material or unexpected services.
Address water, collapsing material or an obstruction through the approved construction procedure. Do not shorten the required support simply because a rock, root or service makes digging difficult.
Drainage Requires an Outlet or an Appropriate Detail
A gravel layer is not a universal solution for a wet hole. Where the surrounding ground does not drain, stone may still sit in water. Use the designed preparation and drainage arrangement rather than adding a generic base layer without checking its purpose.
Step 4: Position, Protect and Restrain the Post
Check the post orientation before placement. Bracket faces, routed openings and gate preparation must face the correct direction. Verify the specified height and check plumb on two perpendicular faces.
Hold the post with suitable temporary restraint that does not damage its coating or distort the section. Recheck plan position, elevation and plumb together; adjusting one can move the others.
Check Aluminum Compatibility at Buried Connections
Follow the approved protection detail for aluminum in contact with concrete, soil or other metals. Address coating continuity, sleeves or isolation where specified. Do not assume decorative powder coating alone satisfies every buried-exposure requirement.
Do not fill a hollow post, add an internal steel tube or drill drainage openings unless the selected design calls for it. Such changes can affect corrosion behavior, connections and future inspection.
Step 5: Install the Specified Foundation or Anchor
For a concrete foundation, follow the specified material, placement and consolidation procedure. Follow the product instructions where a proprietary mix is selected; a dry-placement method for one product is not automatically appropriate for another.
Keep the post restrained and monitor its position during placement. Remove splashes from exposed finishes using the approved cleaning method before they cause damage, and avoid moving the post after the material has begun to set.
For a proprietary ground anchor, follow its installation and acceptance requirements. Confirm that the installed support satisfies the specified conditions before attaching the fence. Installation convenience alone is not evidence of capacity.
Apply backfill, grading and surface details as shown on the approved plan. Keep the finished levels consistent with the panel and gate clearance requirements.
Step 6: Confirm Readiness Before Fitting Panels
Do not load a support until it meets the specified acceptance or strength requirements. For concrete, timing depends on the material, temperature, curing and required strength. Use the actual instructions instead of a universal “wait one day” rule.
Check one trial bay before repeating the assembly. Confirm bracket positions, clear opening, panel height and connection fit. Do not use a panel to pull a leaning post into position.
Plan the selected style with its actual supports: horizontal slat fencing, vertical slat fencing y vertical blade fencing can have different connection requirements.

Gate Posts, Privacy Panels and Sloped Boundaries
Gate Posts
Include leaf weight, gate dimensions, hinge arrangement, operating loads and wind exposure in the support review. Confirm the clear opening and hardware allowances before installing the posts. A line-post foundation should not be assumed suitable for a gate.
Discuss matching aluminum gates with the fence package so supports and connections can be coordinated.
Privacy Fences
Closely screened panels can change wind loading compared with an open layout. If the infill changes during design, review the posts, foundations and connections before retaining the previous schedule.
Sloped Ground
Show the rise and run across individual bays and identify level transitions. Keep post verticality separate from the intended panel slope. Use racking only where the panel is designed for it, or confirm a stepped or custom arrangement.
Can Aluminum Fence Posts Be Installed Without Concrete?
Some complete support systems use driven elements, screw-type anchors or other engineered methods. Their suitability depends on the documented system, ground conditions, connection and installation controls.
Do not substitute a concrete-free method merely because it is faster or easier to remove. Likewise, a temporary decorative installation does not establish a suitable detail for a permanent privacy boundary, pool barrier or gate support.
Ask the supplier and responsible designer to confirm the intended method in writing. If the proposed post product is designed for embedment in concrete, do not assume it can be driven directly into the ground.
Troubleshooting Loose or Leaning Aluminum Fence Posts
| Observation | What to Investigate | Appropriate Response |
|---|---|---|
| Post rocks in the ground | Foundation condition, support design and surrounding soil. | Restrict use as appropriate and obtain a support assessment. |
| Post moved during placement | Restraint and material working conditions. | Use the approved correction procedure; do not force a post through hardened material. |
| Gate starts rubbing | Post movement, support condition and hardware alignment. | Resolve the cause before relying on hinge adjustment. |
| Ground settles around a support | Backfill, drainage and unexpected ground conditions. | Review the affected area rather than hiding movement with surface fill. |
| Damage near the ground line | Finish condition, exposure and connection compatibility. | Assess protection and repair requirements using the approved detail. |
A shallow collar poured around a moving post is not automatically a repair. The remedy may involve replacing or redesigning the support. Record photographs and the installed dimensions before deciding on corrective work.
Before Handover: Installation Checkpoints
- Verify post types, locations and orientation against the drawing.
- Record foundation dimensions and concealed details before covering them.
- Check protection at soil, concrete and dissimilar-metal interfaces.
- Confirm alignment, plumb, elevations and finished clearances.
- Check specified connections, caps and gate operation.
- Confirm any required pool-barrier or other site inspection separately.
- Retain drawings, component references and maintenance instructions.
After installation, inspect supports and hardware periodically and after unusual impacts or ground movement. Follow the supplied care guidance and investigate new movement promptly.

Prepare a Complete Fence Post Inquiry
Send WONDERFUL METAL the site layout, panel dimensions, post positions, proposed mounting method, gate details and delivery location. Include available ground and foundation information and mark details that still require project approval.
For ordering, state total post length separately from visible height. Identify reinforcement, protection, hole preparation, brackets and accessories in the component schedule. Clarify which foundations, anchors and other site materials are supplied locally.
A coordinated quotation helps connect the factory's product scope to the installer's site work, while keeping design and approval responsibilities clear.
Anchoring Aluminum Fence Posts in Dirt: FAQs
Can I put an aluminum fence post directly in dirt?
Only if the selected complete system and project design expressly allow that installation. Loose soil backfill is not an assumed substitute for a specified foundation or anchor.
How deep should the post hole be?
Use the approved support design for the actual fence and site. Height alone does not determine the required embedment or excavation depth.
Is gravel required at the bottom of every hole?
No universal detail applies. Preparation and drainage must suit the ground and foundation design; gravel does not guarantee drainage in a waterlogged hole.
Can aluminum posts touch concrete?
Follow the selected product and project protection detail. Confirm compatibility, coating or isolation requirements for the intended exposure rather than assuming all posts are suitable for direct embedment.
Can I drive a normal aluminum fence post into the ground?
Do not do so unless that post and support arrangement are designed for driving. Impact can damage a section or coating and does not establish the required capacity.
When can I attach panels or hang a gate?
After the support meets the specified readiness or strength requirements. Follow the actual material, anchor and project instructions.
Can base plate posts be used on a soil site?
They can be part of a system with an appropriate structural footing or pedestal. A base plate fixed to a loose paving slab does not establish an adequate support.
Can WONDERFUL METAL customize post lengths?
Send the required total and visible lengths, profile, mounting and connection information for review. Final production follows the agreed specification.
Plan Your Aluminum Fence and Post Package
Send your layout, fence style, post requirements, gate details and destination. WONDERFUL METAL can review the requested components and prepare a coordinated product quotation for your project.
Request a Fence & Post QuoteCorreo electrónico: [email protected]