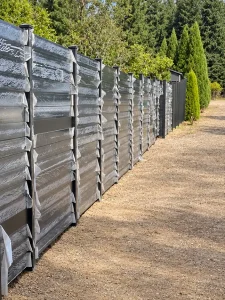
How to Level Aluminum Fence Posts: Plumb, Alignment & Height Guide
Set out your aluminum fence with a clear measurement plan. Learn how to coordinate post position, elevation and orientation across straight runs, sloped ground and gate openings.
Start with the Key ChecksDiscuss Your Fence LayoutHow Do You Level Aluminum Fence Posts?
Check each post for plumb in two directions, locate it against an independent fence-line reference, and set its elevation from the approved layout. Secure the post using the specified support method and repeat the checks before it is loaded.
People often use “leveling fence posts” to describe several different tasks. Separating those tasks makes installation easier to measure and reduces the risk of correcting one problem while creating another.
| Check | What It Means | Typical Reference |
|---|---|---|
| Plumb | The post stands vertically in two perpendicular directions. | A suitable spirit level or post level. |
| Alignment | Posts occupy the intended line in plan. | A surveyed layout, offset string line or suitable optical reference. |
| Elevation | The top or another marked point is at its specified height. | An established benchmark and level or laser measurement. |
| Orientation | The post faces and connection points point in the correct direction. | The plan, panel connections and gate hardware drawing. |
Begin with a Post Schedule and a Finished-Level Plan
Before setting out, identify the panel arrangement, corners, gates and connections to existing structures. Give posts a location or type reference and record any differences in length, mounting or preparation. A corner post and a gate support may look similar while having different requirements.
Show the intended finished ground level at each position, including future paving and landscaping. On uneven ground, decide how the fence top and bottom will transition between bays. A single height measured from existing soil may not produce the intended final appearance.
Confirm approved installation tolerances with the project team. This guide does not prescribe a universal allowable lean, offset or height error: the relevant limits depend on the selected product, connections and project specification.
Tools for Checking Aluminum Fence Post Position
| Equipment | Purpose | Use Carefully |
|---|---|---|
| Spirit level | Check vertical faces and local horizontal references. | Verify accuracy and use a clean, straight contact surface. |
| Strap-on post level | Monitor two directions while positioning a post. | Use a suitable strap or clamp; a magnet alone will not hold to aluminum. |
| String line and stakes | Establish a visible reference for the fence run. | Avoid sag, wind movement and contact that deflects the line. |
| Laser or optical level | Transfer elevations from a common datum. | Follow setup and calibration instructions and use the appropriate receiver. |
| Tape and marking tools | Locate posts, openings and fixing positions. | Distinguish clear opening from post-center spacing. |
| Temporary supports | Hold the required post position during installation. | Use approved restraint and protect coated surfaces. |
Check the measuring tools before relying on a long run of readings. A damaged level, loose laser setup or displaced reference stake can make a consistent installation consistently wrong.
Step 1: Establish a Reliable Fence-Line Reference
Confirm the intended boundary position and required permissions before marking the installation. Arrange the appropriate service locating process before digging or drilling. Do not infer a legal boundary from an old fence or a neighboring structure.
Place reference points where excavation and material handling will not disturb them. For a string line, an intentional offset from the post face can make it easier to check position without the posts touching the string. Record that offset so every installer uses the same reference.
Set out corners and fixed openings first, then reconcile intermediate bays using the approved connection dimensions. If a run leaves a short final bay, resolve the panel schedule before fixing posts permanently.
Measure the Right Spacing
Panel width, distance between post faces and post-center spacing are different measurements. Use the dimension specified on the installation drawing. Do not assume that a panel described as 6ft or 8ft fixes the post-center spacing automatically.
Step 2: Transfer Heights from a Common Datum
Choose a stable benchmark and document the intended elevation of each relevant post point. Transfer levels with appropriate equipment rather than repeatedly measuring from irregular soil or from the previous post.
For a level fence run, compare marked points against the same datum. For a stepped or otherwise changing run, follow the scheduled elevations at each location. The objective is to reproduce the designed line, which may not put every post top at one height.
Allow for the relationship between the panel top, bracket position, post cap and ground clearance. Mark the reference consistently; mixing the top of an uncapped post with the top of a fitted cap can introduce an avoidable height error.
Step 3: Check Plumb on Two Adjacent Faces
Position the post in its intended orientation and place the level against a suitable straight face. Check the perpendicular face as well. One satisfactory reading does not establish verticality in both directions.
Keep the contact surface clear of labels, debris or features that prevent the tool from sitting correctly. If a profile has grooves or decorative faces, use the measurement surface or reference method agreed for that product.
After adjusting plumb, recheck the post's plan position and elevation. Tilting or lifting the post can move it away from the reference line, so treat the measurements as a coordinated set rather than independent one-time checks.
Protect the Aluminum Finish
Use suitable padded contact points where temporary restraints touch coated surfaces. Do not bend the profile, apply uncontrolled impacts or drill additional holes to solve a setting-out problem without approval.

Step 4: Secure Embedded Posts and Recheck Position
Check the excavation and foundation arrangement against the approved design before placing the post. Required embedment and footing geometry depend on the actual fence, site and support design; a generic hole size is not a substitute for that detail.
Hold the post at its specified position while the foundation is installed. Temporary restraint should control movement in the necessary directions without deforming the section. Recheck orientation, two-direction plumb, alignment and elevation during placement.
Follow the specified concrete procedure and working time. If adjustment is needed while material is still workable, use the approved method and then repeat all checks. Do not force a post through stiffening or hardened concrete in an attempt to straighten it.
Maintain supports and keep loads off the post until the installation meets the specified loading conditions. Concrete type, temperature and curing affect the schedule, so use the actual material and project instructions rather than a fixed waiting period from an online guide.
Step 5: Align Base Plate Posts on Existing Concrete
Base plate mounting requires an adequate supporting structure and an approved anchor arrangement. Confirm concrete condition, thickness, edge distances and concealed services before drilling. A decorative paving layer is not automatically a structural fixing surface.
Set out the anchor locations using the specified plate detail or template. Follow the anchor manufacturer's instructions for drilling, hole preparation, installation and tightening. Recheck post position during the sequence because anchor tightening can affect alignment.
If the bearing surface is uneven, resolve it using the designed leveling or grouting detail. Do not introduce loose improvised packing or bend the base plate to obtain a vertical post. The bearing, anchors, weld and post must work as the intended assembly.
Explora WONDERFUL METAL aluminum fence posts when coordinating embedded and base plate configurations.
Keep Posts Plumb When the Ground Slopes
| Fence Arrangement | Post Setting Approach | Important Check |
|---|---|---|
| Stepped panels | Follow the specified post elevations and connection positions for each step. | Check the gap beneath each panel, especially at the downhill side. |
| Racked panels | Keep supports vertical while fitting a panel designed for the intended inclination. | Confirm the permitted movement and connection geometry. |
| Custom sloping panels | Use the surveyed geometry and location-specific panel schedule. | Check orientation and labeling before installation. |
A sloping top line does not mean the posts should lean with it. Unless the design expressly calls for another arrangement, check the posts for verticality and treat the panel slope as a separate geometry issue.
Rigid welded panels must not be forced to rack. Tell the supplier about the rise and run across each bay before ordering, including points where the ground changes direction or steepness.
Gate Posts: Check the Opening Before Hanging the Leaf
Verify the clear opening at the specified measurement points and check both supports for plumb and orientation. Confirm the gate's required hinge and latch allowances against the actual hardware schedule rather than adding a generic gap.
Check support readiness before fitting the gate. During installation, support the leaf using suitable equipment and follow the hardware instructions. Inspect movement through the full travel, including clearance over paving and any slope.
If a gate catches, do not assume that changing the hinge adjustment will solve the cause. Check for post movement, an incorrect opening, frame distortion or support problems first. See our matching aluminum gates when planning a coordinated entrance.
Use a Trial Bay to Verify the Whole System
Before repeating the installation, check one representative bay against the drawings. Confirm the opening, panel elevation, bracket position and finished appearance. This can reveal a repeated measurement or component error while correction is still manageable.
Panels should not be used to pull incorrectly positioned posts into place. If the connections do not fit within the approved arrangement, identify the cause before forcing or modifying parts. Check subsequent bays against the independent reference, not only against the neighboring panel.
Vertical slat fencing y horizontal slat fencing can have different frame and connection details. Use the instructions for the selected system.

Troubleshooting: Straight Post, Uneven Fence?
| Observation | What to Check | Next Action |
|---|---|---|
| Post appears vertical but the row wanders | Plan position against the independent reference | Resolve the offset before permanently fixing the next bay. |
| Post tops vary unexpectedly | Benchmark, cap allowance and finished levels | Recheck the elevation schedule and measurement reference. |
| Post leans after placement | Bracing, foundation condition and loading sequence | Have the cause assessed; follow an approved correction method. |
| Panels do not fit | Actual opening, bracket allowances and drawing revision | Reconcile dimensions before cutting or drilling. |
| Gate opening tapers | Both posts in two directions and the support condition | Resolve the support geometry before final hardware adjustment. |
| Post moves at the base | Foundation, anchors, substrate and connections | Restrict use as appropriate and arrange assessment. |
A post already fixed out of position needs a repair plan suited to its installation. Do not lever it through cured concrete, enlarge anchor holes casually or heat the aluminum to straighten it. Correction may require removal, replacement or a redesigned connection.
Pool Fence Layouts Need an Additional Final Review
When the fence is a pool barrier, alignment is only one part of the completion check. Review the actual openings, ground gaps, gate operation and surrounding landscape against the requirements applicable to the site.

Do not adjust panel heights simply to create a pleasing top line if that change affects the required barrier function. Discuss the complete layout with the responsible installer or designer. Browse our aluminum pool fence range during specification.
Post Alignment Inspection and Handover Checklist
- Confirm each post type, orientation and location against the approved drawing.
- Record plumb readings in two perpendicular directions where inspection requires them.
- Check alignment against the original reference points.
- Verify scheduled top elevations and panel clearances.
- Check bases, foundations, anchors and connections using the specified procedures.
- Confirm caps, finish condition and gate operation.
- Document concealed work, approved changes and any remedial action.
Retain the post schedule and installation records for future maintenance. If later movement appears, compare the new observations with the completion record before deciding on a remedy.
Order Posts Around the Installation Layout
For custom manufacturing, provide visible height and total post length separately. Mark stepped bays, gate supports, wall connections and any special fixing positions. State whether holes and brackets are factory-prepared or fitted on site.
WONDERFUL METAL can review the requested fence components and supply scope using your drawings. Include panel dimensions, mounting conditions, gate details, finish, quantities and delivery destination when requesting a quotation.
A clear component schedule links the fabrication drawing to the packing list and site layout, helping contractors identify the correct post before installation starts.
Aluminum Fence Post Leveling FAQs
What is the difference between plumb and level?
Plumb describes verticality; level describes a horizontal reference. Fence installation also requires correct plan alignment, elevation and post orientation.
Can I use a magnetic level on an aluminum post?
A magnet alone will not hold to aluminum. Use a suitable strap-on tool, a padded compatible clamp or a handheld level with a reliable contact surface.
Should every post top be at the same height?
Only if the design calls for that. Sloped or stepped layouts may have different scheduled elevations while the posts remain plumb.
How do I keep posts straight while concrete is placed?
Use suitable temporary restraint and check position during the specified placement process. Follow the foundation detail and protect the post finish.
Can I straighten a post after the concrete hardens?
Do not force it through hardened concrete. Have the installation assessed and use an approved repair, replacement or resetting method.
Can panels pull leaning posts into line?
Panels should fit the designed support geometry. Using them to force posts into position can introduce unintended stress or damage.
How accurate must the post alignment be?
Use the tolerances agreed for the selected system and project. Connection limits, appearance and gate operation can all affect the required accuracy.
Can WONDERFUL METAL supply custom posts and gates?
Send the layout and required specifications for review. Confirm post lengths, profiles, mounting, connection preparation and gate requirements before production.
Plan Your Fence and Post Package with WONDERFUL METAL
Send your fence layout, post schedule, finished levels, preferred style and delivery location. We can review the requested panels, posts, gates and accessories for a coordinated quotation.
Send Your Drawing & Request a QuoteCorreo electrónico: [email protected]